Performing your own maintenance on your RV is a good way to save some money and to make sure the job is done right. In this quick tip, I’m going to show how to change the oil in an ONAN generator. You should change the oil once a year or every 150 hours of operation, whichever comes first.
The operation I’m going to discuss is tailored for an ONAN 5500 but is similar for all ONAN generators. The only exception would be that some may use different filters or no filter at all. I did create a video on my YouTube channel to show how to perform an oil change on an ONAN 4000.
To perform this job, you’ll need the following items:
- 2 quarts of oil (see below)
- Oil Filter
- Oil filter wrench
- Oil funnel
- Oil drain pan
I recommend using the manufacturer recommended oil in these generators. Its a bit on the expensive side but you know it is fully compatible. As such I used ONAMAX SAE 15W-40 that I bought off Amazon. It came in a pack of four quarts, so its enough to do two oil changes. According to the Onan user manual, this oil is suitable for operation in a temperature range of 10 degrees F to 100 degrees F. Other acceptable oils are per my manual are as follows:
- 32 degrees F and higher; SAE 30 viscosity
- 0 degrees F to 80 degrees F; 10W-30 or 10W-40 viscosity
- -20 degrees F to 50 degrees F; 5W30 viscosity
For the filter I also went with an original replacement and used an Onan 122-0836 filter, also available on Amazon. Make sure to use an oil filter wrench that is sized correctly for your filter. I have a 3-jaw wrench (shown below) that is highly adjustable and suitable for this job. A funnel, although not required, will make adding oil a bit easier. Any oil drain pan will work since only 2 quarts of oil will be drained.


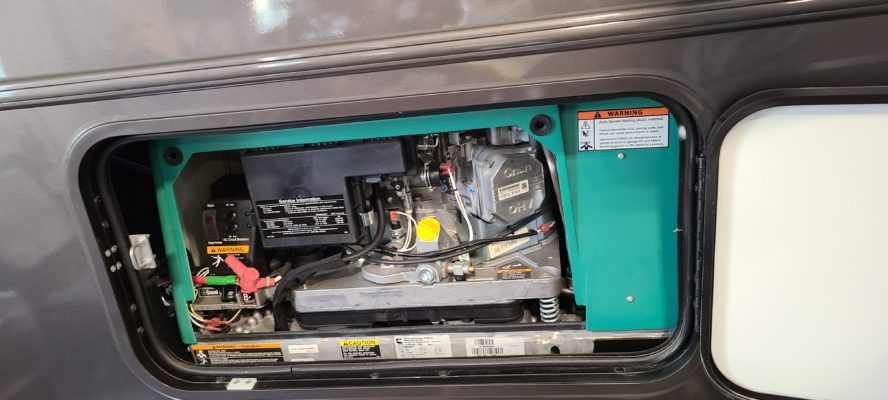
To get started, I recommend running the generator for 15 minutes to heat up the oil and to ensure a more complete drain of contaminants. Open your RV generator access door (Winnebago Adventurer shown), pull back on the top of the access panel as shown in the next two photos.


Many RV bay doors won’t let the panel open more than a few inches. Once its open some, simply lift up on the panel to remove it at the bottom.

Locate the drain valve. On my unit, it was a small threaded unit that I’m pointing at. Place the drain pain directly under the drain line underneath the generator and turn the valve counterclockwise until the valve is fully open. The oil will then drain into the pain (see 2nd photo below).

Once all the oil is drained, close the valve and move the drain pan under the filter (shown in with the red arrow). Use the oil filter wrench to turn the filter counterclockwise to loosen it. Completely remove the filter and turn upside down in the pan to drain. Ensure the rubber gasket came off with the filter.

Prepare the new filter by filling center cavity with fresh oil then smear a light coat of oil on the rubber seal. Thread the filter onto the generator until the gasket seats. Turn the filter 1/4 of an additional turn.

Remove oil dipstick cap from the fill hole by turning counterclockwise. Add remaining oil to the fill hole (top center of the picture below). Note that you have to add slowly to ensure it doesn’t run out of the hole since it isn’t very deep. Reinstall oil dipstick cap then remove to verify the oil is near the “full” mark (top of the dipstick measurement area as shown with red circle). Reinstall dipstick cap and run generator for 15 seconds to prime and fill the oil filter. Check oil level and add any additional required oil until full. Reinstall the panel in opposite order that you removed it.

Congratulations on changing your oil. Wasn’t too difficult, was it? Make sure you dispose of the oil properly. You can dispose of the old oil at many automotive part stores or your local landfill. Happy trails!